If you’re used to a premium audio listening experience, you may have noticed that the speakers on your Standard Range Model 3 are not cutout for your ears.
And if you own a Long Range or Performance Model 3 and still find the audio quality insufficient, I have some upgrade recommendations that will please your ears.
I will be going through all the options at your disposal (OEM and aftermarket), including their cost and installation procedures, to help you with your decision.
The music will sound so good that you wouldn’t want to leave your car even when you’ve reached your destination.
2 Tips to Make Your Model 3 Sound System Sound Better
1. The Easy One
Before we get into the modifications, there’s one thing that you can do (if you haven’t yet) to make your audio sound much, much better.
If you use Spotify (or other streaming services) and you’re not pleased with what you hear, improving your Internet connection might help. Consider upgrading your mobile plan or subscribing to Tesla’s Premium Connectivity.
If you like playing your favorite songs through a flash drive, make sure that the songs you download are 320 kbps, as those will give you high-definition sound.
If you haven’t tried these methods before, you’ll be surprised by the difference the file quality and a great quality signal can make.
With that out of the way, let’s get into the actual modifications.
2. The Costly One: Activate the Inactive Speakers
So this part is kind of weird.
You may have speakers in your Model 3 that are inactive.

Yes, you have to activate these speakers.
If your Model 3 is pre-2020, you might even have rear speakers that you can activate.
The later models only have two front tweeters and two surround speakers.
To activate these four speakers on your 2022 Model 3, this Hansshow DIY wiring harness comes in handy. It will also work on the 2021 model.
This radio wire harness routes the wires from these inactive speakers to the ECU for the speakers to come to life.
If you have a pre-2020 model, you can use this one, and it would work without a problem.

Sound System Upgrades You Can Do
In this article, I will cover all the sound system upgrades you can make to your Model 3.
✅ Adding an OEM subwoofer with an amplifier
✅ Adding an aftermarket subwoofer with an amplifier
✅ Replacing the OEM speakers, woofers, and tweeters
Once you have made up your mind on which one will work for you, you can then move on to the installation of each at the end.
These 5 rare tips can save you so much time and stress – and few owners know about them (even after years of ownership). Sign up below to learn more. It's free!
OEM Model 3 Premium Audio Upgrade: OEM Subwoofer (Complete Guide)
Before diving into the aftermarket stuff, let’s talk about the OEM upgrades that Tesla offers for your Model 3.
You can’t add this while making your purchase — you have to wait for that never-ending delivery schedule. After which, you can order the subwoofer.
Now ordering is also a bit confusing.
You would have to book an appointment, even if you are going to DIY, as you need to order the part through the service chat.
The part number for the subwoofer is 1079747-00-D, which will cost you around $300.
Weirdly, you can’t order it from the online store.
If this option doesn’t seem to work for you, there’s an alternative.
You can call the service center directly and ask them for the product on the phone. If the staff is nice, you will get the OEM subwoofer without a problem.
If the service center does not comply with your request, try calling some other place (another state, maybe?).
You might have to pay some extra bucks on shipping, but you’ll surely find a service center willing to provide you with the subwoofer you’re looking for.
And once you have the subwoofer, you would need an amplifier (aka amp) to go with it.
During my research, I came across a couple of options for the amp, but one of them really stuck with me as the charge levels weren’t affected by the added subwoofer and amp.
My amplifier of choice would be the Alpine KTP-445U, which will cost you about a pair of Apple AirPods.
So instead of getting the sound that you can only hear up close (as in Apple Airpods), why not get something that the whole neighborhood can enjoy along with you?
But make sure to keep it contained so the neighbors won’t throw a stone through the window to hear it better.
Now let’s go to the wires that you’ll need for this setup.
Heads up, this is where you will have to cut some wires, but not literally — you will be tapping into the speaker wires to give life to your subwoofer in the back.
Parts Required
✅ OEM subwoofer
✅ Amplifier
✅ Speaker wire
To connect the amplifier to the subwoofer, you need to power the amp with a 12V input, for which you will also need to find a suitable ground. So you will need:
✅ 10 gauge ground and power wire (8 feet each)
To get the subwoofer those lovely tones, you need to route the speaker wires from the amplifier output to the subwoofer. You will need:
✅ Speaker wire (order 50 feet; having extra is better)
To splice the wires and get a signal from them, you need to have:
✅ Posi twist connectors
✅ Posi taps
Make sure that the connectors can handle 18 gauge wire size and that the taps can handle the 12 gauge wire that you will find in the door speakers.
Activating the Inactive Speakers As Well (Optional)
You can also order a DIY set of wires from Hansshow.
The added benefit of this harness is that it will help activate those rear deck speakers that come from the factory in the SR+ model which came before March 2020.
However, if you’ve already used the Hansshow harness for the inactive speaker, you can simply order the speaker wires needed to connect the subwoofer, which I will go into detail in the later section.
If the DIY harness from Hansshow is not available, you can go with the EVOffer DIY Kit, which also gives you the option to mount the subwoofer with the whole assembly.
They have a very detailed catalog specific for each variant of the SR+. After confirming your variant, you can order them without a hitch.
Once you have the kit, you can now roll up your sleeves and prepare for some elbow grease in this DIY.
Remember to take your time. It can be a little daunting, but nothing is impossible.
Be patient with it, and you will be happy with the results.
PROS
✅ Excellent base
✅ No significant charge loss
✅ Efficient
✅ Having an amp would give you more room for further modifications
CONS
❌ Installation can be challenging
❌ Sourcing the OEM subwoofer can be a little difficult
❌ Requires tapping into the wires
Best Aftermarket Tesla Model 3 Audio Upgrade: Pioneer 8-Inch Subwoofer

There is a sea of options when it comes to aftermarket subwoofers.
My personal favorite is Pioneer as it gives the bass that I like — deep, very deep. Its price is also very economical, much cheaper than the OEM.
It draws a somewhat similar charge to the 8-inch OEM subwoofer, but the sound quality is much better and crisper.
Similar to the OEM subwoofer, aftermarket subwoofers also require an amplifier.
If you already have an aftermarket amplifier (Alpine KTP-445U) for the OEM subwoofer, you can use the same one for any 8-inch subwoofer without a problem.
The installation is very similar to that of the OEM subwoofer.
The biggest value of an aftermarket subwoofer is the quality of base it provides over the factory ones.
Premium aftermarket stuff usually tends to outshine factory products.
You can follow all the installation steps mentioned in the later section of this blog and enjoy your aftermarket subwoofer.
PROS
✅ More bass
✅ Crisp sound
✅ More economical
✅ Charge draw is minimal
CONS
❌ Challenging installation
❌ Requires tapping into wires
Buying Independent Components
Tesla Model 3 Aftermarket Subwoofer Upgrades
The factory speakers on your Model 3 can be replaced with aftermarket speakers.
To make your search convenient, I took the liberty of finding you the best replacements available and where to get them.
Enjoy!
- The 4″ corner dash speaker can be replaced with a 3.5″ aftermarket speaker.
- The 8″ factory woofer can be replaced with the more economical 6 ½” or 6 ¾” aftermarket speakers, but you would need a special bracket that some have made through printing. You might also like the JBL 6.5″.
- You can add rear deck speakers, but then again, you would have to use posi tap to tap into the wires you routed for the amplifier, or you can route separate wires for the added speakers.
For the rear speakers, you have plenty of options. You would only have to make some mountings and tuck in all the wires to make it look sleek.
Tesla Model 3 Sound System Upgrade: Detailed Installation Guides
In this section, I will cover the installation of the Model 3 OEM subwoofer, amplifier, and everything that goes with it. You will learn everything from start to finish.
Once you are well-versed, you can add any aftermarket subwoofer you’d like.
After the subwoofer addition, you will learn everything about the activation of those inactive speakers in great detail.
Once you have grasped the basic idea, you can add any other speaker to your Model 3 with ease.
Tesla Model 3 OEM Subwoofer Installation
Step 1: Remove the Panels
Before we go to the subwoofer and amplifier installation, make sure you have already installed the DIY harness.
Then the rear trunk liners need to be removed. There are a couple of clips holding them together that you can pry out, which is pretty simple.
Step 2: Remove the Rear Seats
This is the tricky part.
You need to take out the rear seats to access the power source that will be used for the amplifier.
Taking the seat out might be daunting for some people, but here’s a trick: The seat can easily be removed by a lever that’s located underneath.
To find it, you have to feel it and then twist it.
Once the lever is twisted, you can easily pull the seat off, and you will find two harnesses connected to the seat, which you can easily remove.
While you are at it, you can remove the side panel, which is held in place by some connectors; simply pull it out.
Once that panel is clear, you can remove a small cover on the area under the seat and close the door.
When you lift it and it’s not firmly connected to anything, you can easily lift it without a hassle, and you will find the power source to power the amplifier.
The seat’s back is held in place with two 13 mm nuts on both sides, which you can remove, and voila, the seat’s back will come out.
Oh, and don’t forget to remove the wiring harness.
I didn’t forget that.

Ahem, so yeah, take the connectors out on both sides of the seat and take the seat out.
Pull the lever on the top of the seat, fold it down, lift up on the corner closest to you, and slide it out.
The seat on the driver’s side would also have the seat belt, which comes in the way of you taking it out. You can remove the seat belt and then the seat.
Or simply lift the seat up and gently incline it on a soft towel toward the front so you will have space to work with.
Step 3: Remove the Floor Liner
After you have removed the seats, no more hindrances will prevent you from taking the carpet/trunk liner out to get to the bottom of the case, I mean the trunk.
I sound so much like a detective here, getting to the bottom of everything.
Anyways, you can now remove the clips that keep the liner in place on the right and left corners.
The whole length of the liner is held in place by velcro, which is not held in place as it should.
The velcro can come off from its attachment — from the wrong side — and you would have to glue it to the vehicle or find other ways to keep it in place.
Pop the other clips that will appear on the right side of the trunk.
Remove the remaining clips from the rear panels as well and the whole assembly should come off.
With all this removal, you are pretty much done with the prep work.
To gain access to the front speakers, you can refer to my DIY harness installation, where I have mentioned all the steps in detail.
Once you have gained access to the signal wire and the harness, move on to the next step.
Step 4: Route the Wires to the Amplifier
Now the amplifier needs the audio input from the main ECU, which your front speakers have. It also needs the turn-on signal. The wire is also known as the turn-on wire, remote wire, or signal wire.
The signal wire basically tells the amplifier when to turn on by providing +12V DC.
This is where we put in the signal wire for the DIY harness. You can tap into this wire using a posi tap and route it to the amplifier.
Now for the speaker input, you can either use the driver’s side or the passenger side.
I would recommend using the passenger side so you can simply route the cable to the back (right side, where the factory puts the OEM subwoofer).
To tap in the RCA cable, or speaker wire, from the speaker harness, the polarities are as follows:
Brown is negative, and gray is positive.

For the older, pre-March 2020 models, the colors are different. On the driver’s side, white is positive, and blue is negative. On the passenger side, orange is positive, and black is negative.
Make sure you don’t cut the wire unless you’re sure that the length of the wire is sufficient to reach the amplifier without a problem.
Consider the twists and turns to keep it tucked in.
With this, the major wiring portion is complete.
After this, only the simple wiring is left to go.
Step 5: Power the Amplifier
You’ve already found the source in step 2. The area which has a red wire coming out is the one that you can tap in to give power to your amplifier. You don’t have to route the power cable all the way from the battery.
Make sure you make a nice and clean ground for the amplifier, which is often the major cause of headache and frustration in sound system upgrades.
If the ground is not well made, you’ll have issues. So run the power cable from the source to the amplifier and run the ground cable to the chassis. Make sure not to damage any wires in the process.
Make sure that you don’t run the power cable parallel to the speaker wire as the interference can cause disruption in the sound and you won’t be able to enjoy the music for which you have gone through so much trouble.
Step 6: Give Life to the Subwoofer
Now is the moment of truth.
With all the wires and harnesses in place, we’ve come to the last step of the installation.
The OEM subwoofer is a dual coil, which means you will come across two sets of wires.
To make things easier, you can twist the pairs together.
The red and green wires go together to make the positive, while the black and blue wires go together to make the negative.
Route these cables to the amplifier and take the speaker wire to the subwoofer from the amplifier, and you’re done.
However, mounting the subwoofer and the amplifier is somewhat subjective, and most people have their own preferences.
I would personally recommend mounting the subwoofer where the factory ones go. The area on the right side of the trunk will welcome it with open arms and will only ask you for one bolt and two 10 mm nuts.
Two bolts will come out of that place, so you will end up with one extra bolt to mount the amplifier.
The amplifier mounting can be done along with the subwoofer. It can also be placed elsewhere, such as on the top of the trunk or on the side (exposed).
The amplifier generates heat, so it’s best to put it where it can have space to dissipate all that heat. I’ve seen some mounted very close to the subwoofer, enclosed behind the black cover, which is okay but not the best.
Making a bracket on the top right of the trunk would be a good option. In the end, it all depends on you.
Tesla Model 3 Hansshow Harness DIY Installation Procedure
The wiring harness is not expensive, but the installation can be a little challenging.
However, if you are the wrenching type and have made quite a DIY portfolio, it might not be that hard for you.
There are several YouTube videos that can help you through the whole process, just like this one from Jim’s Garage.
Note that Hansshow is not liable for any damages that may occur during the installation.
If you experience any glitches in your rear-view camera or other electronics, you won’t be able to ask for a refund.
So make sure that during installation, there are no exposed wires and that you use heat shrink and cover all ends.
Now let’s get into the installation.
But before you do anything, power off the vehicle from the menu.
Step 1: Pry out the panels on the doorsill (passenger side)
When you order the Hansshow cable, you also get a prying tool you need for the job.
You can start from the front passenger side (left) where the door hinge is located. There are two separate pieces at the doorsill, which you can remove.
The upper one is smaller, which you remove first. After which, you will see a black clip that holds the lower piece. Push it and pry out the rest of the panel. It is huge and will come out as one piece.
Step 2: Take out the panel under the glove box area
Under the glove box area, you will find three clips waiting to be pried out.
After removing the clips, you can remove the panel, and voila, you will see the speaker attachment there.
Remove the wire from the speaker and the wire for the footwell light.
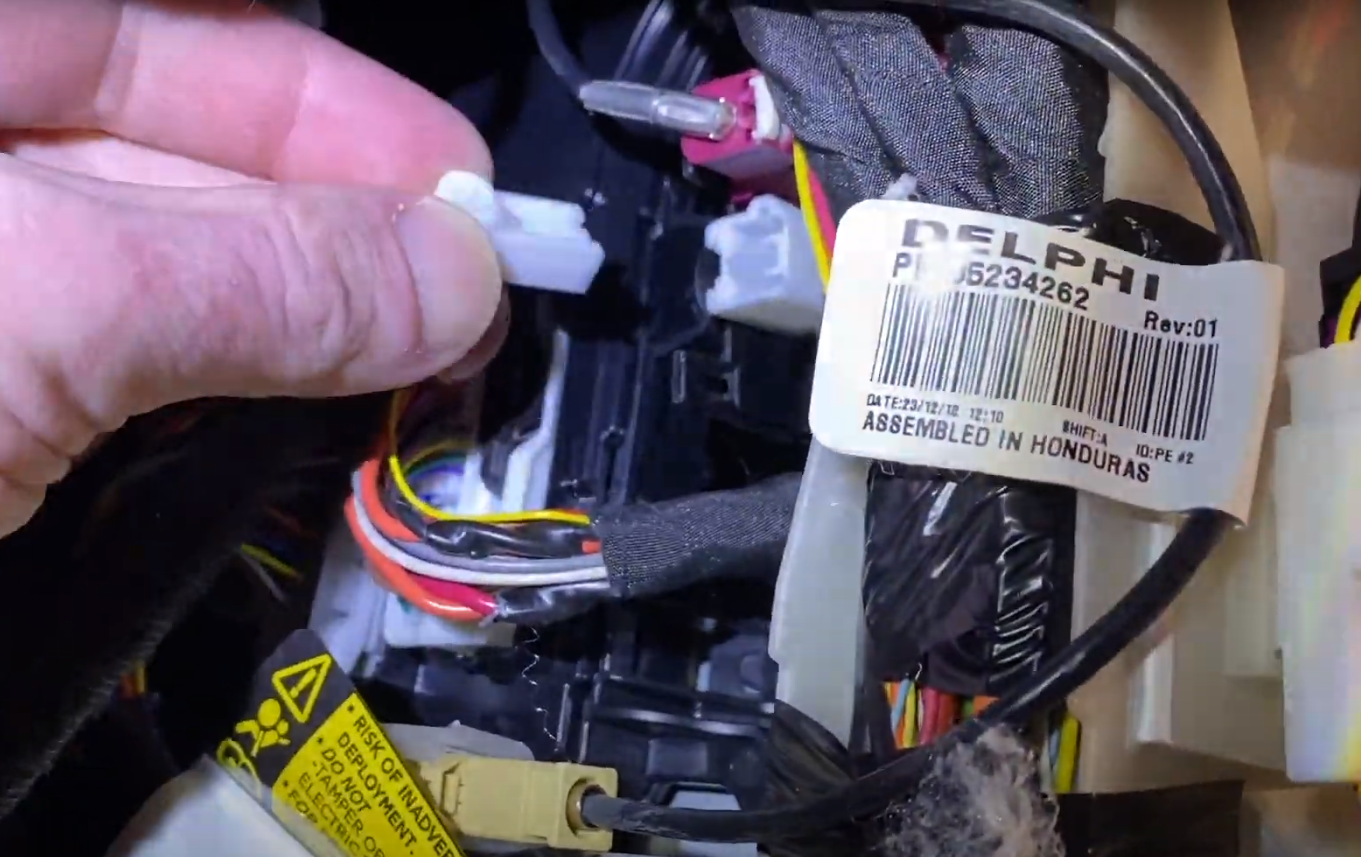
Step 3: Connect the Hansshow harness in line with the factory harness
Once everything is out of the way, you can look under the dash, and you will find a lot of wires. The wiring harness for the speakers will look like this.

The wire that has so many colorful wires coming out and the harness itself will go into this silver thingy; this is what you need to remove.
The Hansshow wire will go into this silver thingy, and the factory harness that comes out will be attached to the other hand of the Hansshow wire we had put in.
Step 4: Attach the signal wire
Take the signal wire from the box.

You can insert the clip into the right side of the footwell area, where you will see an empty slot.
Step 5: Repeat steps 1–4 for the driver’s side
The difference in removing the panel under the dash here is that there are two clips instead of three, and the third one is a T20 Torx screw.
Pry out the panels on the door hinge side and remove both panels similar to the passenger side.
The speaker harness on the driver’s side looks like this.
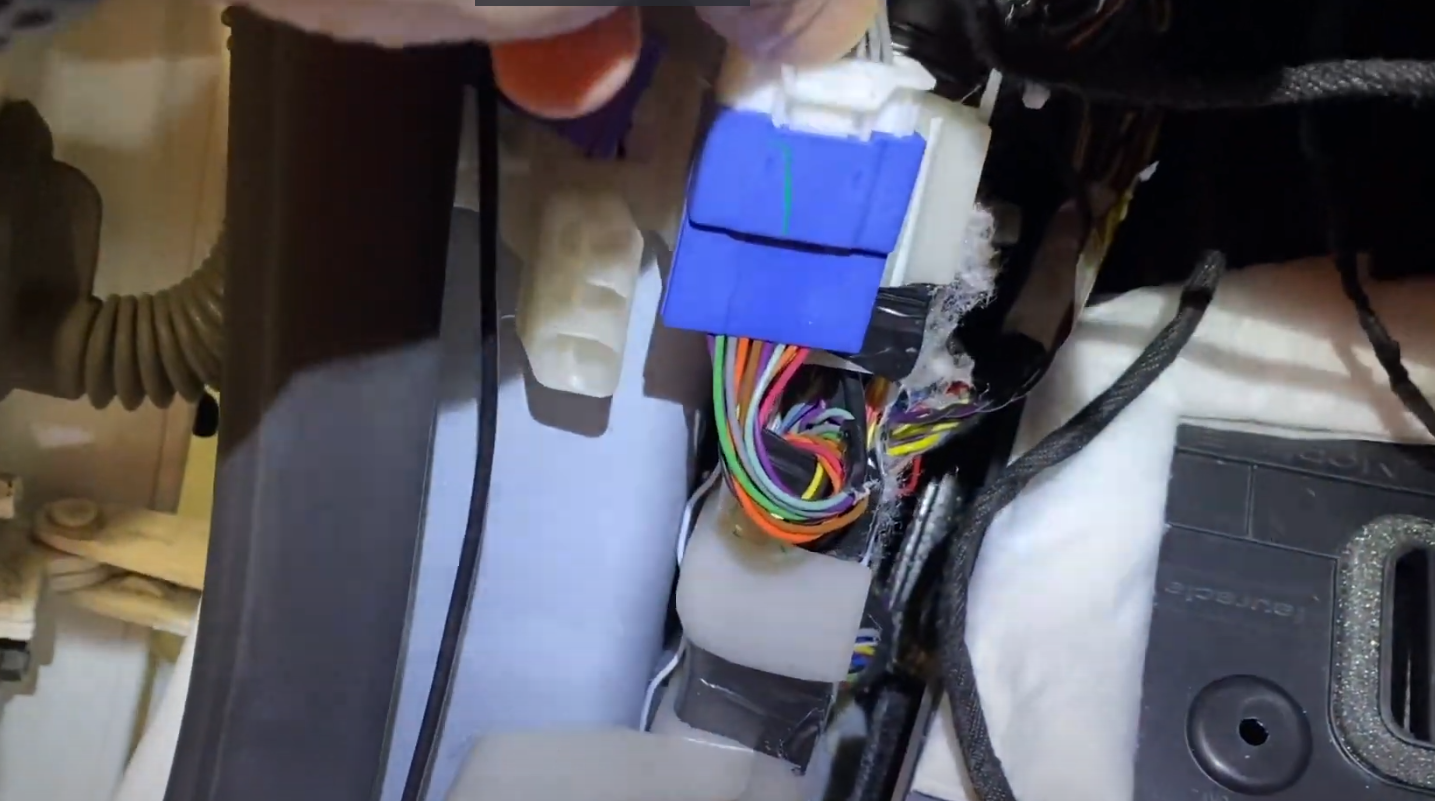
You can insert the Hansshow harness here in line with the factory harness.
Now comes the signal wire.
Behind the harness, you will find a red and purple wire, which is the signal wire. You would have to remove that wire and put the Hansshow signal wire instead.
Make sure to secure the wire you remove so it won’t interfere with any other wire.
Step 6: Turn on the vehicle and test the speakers
When you turn on your Model 3, test out the speakers to see if they’re working properly, and if they are, you can move on to tucking all the wires below the center console.
Step 7: Remove the Black Panel Under the Center Console
Pry out the panel and you will see this area.
The panel is pretty tight, so you have to use some extra force here. Make sure to put back the rubber pieces that might get stuck into the holes.
To pry the piece out, insert your prying tool below the panel, around the center area, and pull it back.
Slide the prying tool toward the front while pulling it back to release all the clips.
Step 8: Repeat Step 7 for the Other Side
Remove the black panel on the other side of the center console.
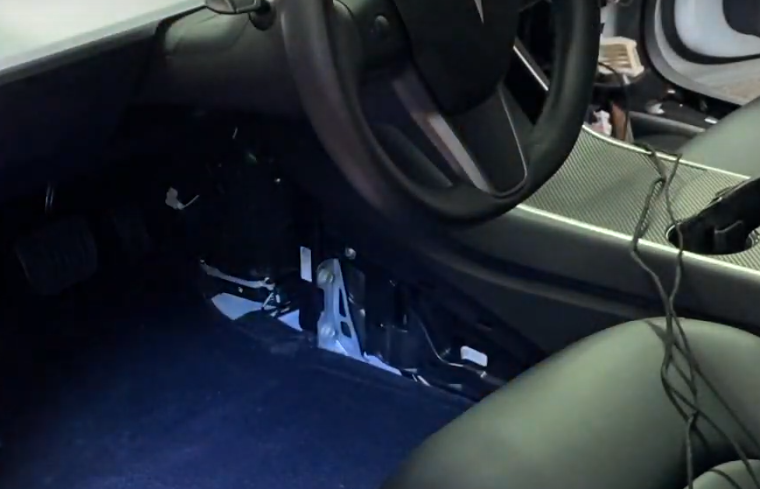
You will find a cavity under the center console where you can run your wires in stealth mode.
Step 9: Hide All the Wires
You can now take all the wires, run them behind the carpet area under the dashboard, and then take them down along the crevice into the center cavity.
Do the same on the other side and insert the harness in place. Make sure you hear a click, which means the harness is intact and ready to roll.
There have been instances where people experience glitches, and the harness not being properly inserted is one of the causes.
Step 10: Put All the Panels Back in Place
The black piece under the center console has a clip that will go on the front side of the center console area.
First, put that in, after which you can push in the rest of the clips.
Put back the rest of the panels.
And you’re done.
With the inactive speakers working, you’ll feel a whole lot of difference, and the immersive sound will sound even more immersive.
The surround sound will also be much better. If you have the older Tesla Model 3, you have the option of the rear speakers as well.
However, the production line probably figured out a way to not put the rear ones without having to increase the production cost.
The front ones are probably there because removing something from the production line can cost you more than just not adding it while assembling.
It also suggests that the initial production line for the SR+, Performance, and Long Range models might be the same.
Frequently Asked Questions About Model 3 Audio System Upgrade
How many speakers does a Tesla Model 3 SR+ actually have?
Normally, you get eight speakers for the Tesla Model 3 SR+.
In reality, though, you probably have more.
Yes, there are more than eight speakers in your SR+. Eight speakers are active, while the remaining ones are inactive.
Depending on your model year, you may also have the rear speakers.
The speakers that come with the A-pillars (four in total) are inactive, but you can activate them using a DIY kit, which I have explained in detail in this article.
The Performance models have 12 working speakers to delight your ears.
Does the Tesla Model 3 have external speakers?
The external speakers were added in the safety recall made in 2019.
So if your Model 3 is a post-2019 model, you probably have external speakers to let the pedestrians or cyclists know you’re on your way.
The engine, coupled with the exhaust, normally does the trick, but in the case of Teslas, help is needed from the speakers to basically do the same thing.
Is there a limit to how many speakers you can add to the Tesla Model 3?
The sky’s the limit as to how many speakers you want to add in gas vehicles, but not in EVs.
If you’re coming from a premium audio listening background, I can understand that the Model 3 audio system is not on par with what you’re looking for.
To tackle this problem, you can replace the speakers and add premium brand subwoofers.
The brand you choose depends on your personal preference and budget.
As you know, it’s all about that bass, about that bass.
However, this is only an option when you’re unsatisfied with the bass you’re getting from the factory subwoofer.
The easiest — and the best — way to avoid shorts is to replace the factory woofers, tweeters, and subwoofers.
Final Thoughts
After hours of research and work, I would recommend that you go for the factory subwoofer or the 8-inch Pioneer subwoofer.
Moreover, my amplifier of choice is the Alpine KTP-445U, which won’t take extra amperage, and you won’t have to put in extra fuses. It will work just fine.
Use the DIY harness — either the Hansshow or EVOffer. It’s totally up to you and their availability, of course.
The best way to listen to high-quality music is to connect through a USB and make sure that you download 320 kbps songs as they would make a day and night difference compared with your regular song streaming.
Zac Ludicrous
Mechanical engineer by profession. TSLA shareholder before the hype. EV enthusiast all day long. Zac enjoys learning about the future of battery technology, autonomy, and EVs. He considers Tesla Model 3 the most important vehicle of the 21st century -- and is in a quest to improve the ownership experience of every Model 3 owner he possibly can.These 5 rare tips can save you so much time and stress – and few owners know about them (even after years of ownership). Sign up below to learn more. It's free!

